REVIEW · SINGAPORE
Singapore Photography Masterclass – Private Photography Lesson
Book on Viator →Operated by Aperture Tours · Bookable on Viator
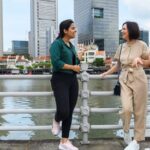
Your camera finally clicks with purpose. This private Singapore lesson pairs a local photographer’s street-wise eye with hands-on guidance on settings and composition. You can shape it around daytime street photos or a night portfolio route, which is a smart way to match your mood and your skills.
Two things I really like: you get realtime feedback as you shoot, and your guide adapts to your gear and goals instead of running a generic slideshow. One consideration: the experience is about practice, not equipment shopping, so if you don’t yet feel comfortable adjusting basic settings, you’ll get the most out of it by coming ready to shoot.
In This Review
- Key highlights you’ll actually feel on this tour
- Why a private photo masterclass makes Singapore easier
- Day street vs night portfolio: choose the look, not just the time
- Meeting at Esplanade Bridge: start with a plan, not a scramble
- Chinatown + Buddha Tooth Relic Temple: texture, people, and story framing
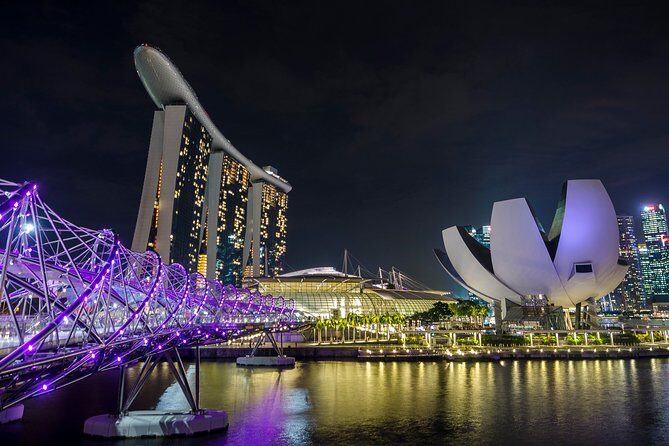
- Jubilee Bridge + Marina Bay: learn to read light across water
- The Helix Bridge to Gardens by the Bay: practice “clean frames” in a bright city
- Supertree Grove: the moment your night portfolio starts looking professional
- Price and value: what $190 gets you in real teaching time
- Who this tour suits best (and who might feel mismatched)
- Practical tips to get sharper results fast
- Should you book this Singapore Photography Masterclass?
- FAQ
- How long is the Singapore Photography Masterclass?
- Is this a private photography lesson?
- Where does the tour start and end?
- Do I need to bring my own camera?
- Is a tripod included?
- What’s included in the price?
- What are my route options during the session?
- Is there a mobile ticket?
- Can I cancel for a full refund?
Key highlights you’ll actually feel on this tour
- Private, coach-style attention from a professional photographer guide, not a crowd tour script
- Street or night focus so your time matches the look you want in your photos
- Settings coaching in plain language: aperture, shutter speed, ISO, and focus
- Iconic Singapore stops with photo logic, from Chinatown textures to Marina Bay light
- Flexible route choice for night shooting, including time around Gardens by the Bay and Supertree Grove
Why a private photo masterclass makes Singapore easier
Singapore is one of those cities that can overwhelm your camera. Too many scenes. Too many angles. Too many lights. The best way to improve isn’t to keep snapping randomly—it’s to slow down and learn why a frame works.
That’s what this experience is built for: a private lesson led by a professional photographer guide, plus local guidance so you’re not guessing where the light hits best. You’re not just walking past landmarks. You’re practicing the relationship between your camera settings and what you’re actually seeing in front of you.
Another reason I like this setup: you’re given options. You can choose a daytime street photography flow or build a night portfolio instead. If you’re working on portraits, motion, or composition, the time of day changes everything—and the tour lets you aim for the results you want.
You can also read our reviews of more private tours in Singapore

Day street vs night portfolio: choose the look, not just the time
This masterclass basically gives you two pathways, and picking the right one can make or break your results.
A daytime street photography session tends to help you with:
- Finding angles that feel natural
- Working with real-life scenes in motion
- Getting comfortable with focus and exposure when the light is changing quickly
A night portfolio session helps you with:
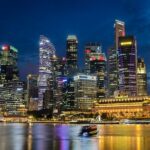
- Shooting in low light without turning everything into mush
- Capturing modern Singapore lighting around the water and skylines
- Planning for twilight-to-night changes (you get that transition, not just darkness)
There’s also a practical bonus: the tour offers a good range of departure times, so you can fit it into your day. That matters in Singapore, where your best photos often depend on timing more than on travel days.
Meeting at Esplanade Bridge: start with a plan, not a scramble
The session begins at Esplanade Bridge on Esplanade Dr. From there, you return to the same meeting point at the end. That loop keeps your logistics simple and makes the shoot feel focused, not like you’re chasing landmarks across the city.
Before you move into Chinatown and the Marina area, your guide’s job is to get you thinking in camera terms. The tour is designed to help you master:
- Aperture
- Shutter speed
- ISO
- Focus
If you’re new-ish, this kind of coaching is gold because it turns settings into something you can actually use. If you’re already a semi-pro, the value shifts to refinement: how to adjust when the scene changes fast, and how to translate your creative ideas into consistent exposure.
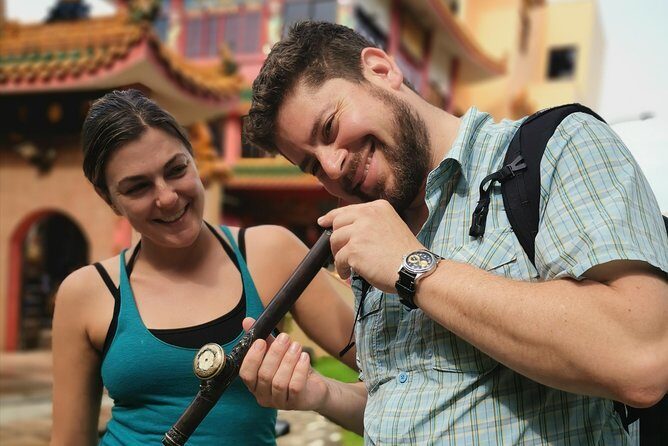
And yes, the guide can work with your gear. One review noted that the photographer didn’t know the exact camera model in advance, yet still gave detailed help with settings. That’s exactly what you want from a true teacher: they adapt.
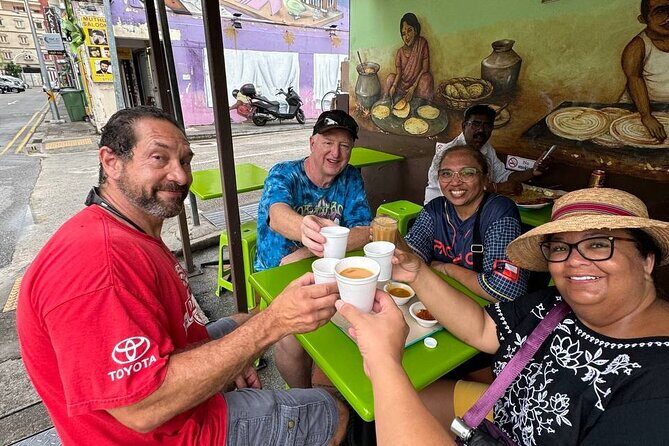
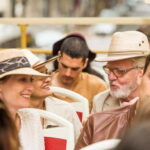
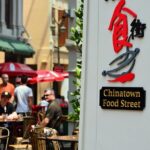
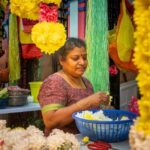
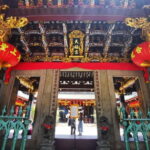
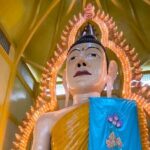
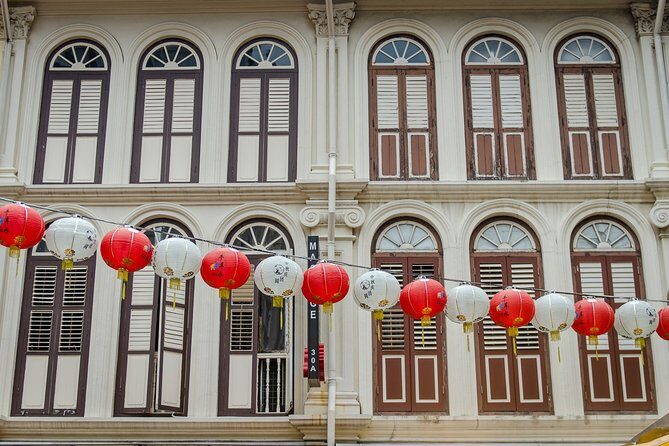
Chinatown + Buddha Tooth Relic Temple: texture, people, and story framing
The route takes you into Chinatown, then on to the Buddha Tooth Relic Temple and Museum. This part of Singapore is great for learning how to shoot more than just buildings.
Chinatown is visual practice. You’ll run into:
- Dense street scenes where composition gets tricky fast
- Contrast between old architecture and modern motion
- Faces and small moments that reward patience
The Buddha Tooth Relic Temple area adds structure. It’s a place where you can learn:
- How to find angles that respect the subject (not just shoot straight-on)
- How to balance bright details with darker surroundings
- How to keep your frame from feeling cluttered
A smart way to use this stop is to treat it like a mini assignment: shoot a few frames for composition, then swap to a setting-focused sequence. For example, try one approach for depth of field (aperture control), then try a different approach for motion or clarity (shutter speed and focus). The point is to feel what changes in your photo instead of memorizing camera settings from a manual.
Potential drawback here: this stop can be busy, depending on the time you choose. If you prefer quiet shooting, daytime might feel crowded at times. Still, that’s also real street practice, and the private setup helps you wait for cleaner frames.
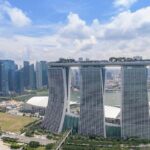
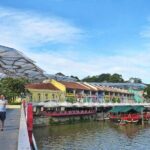
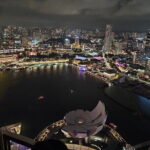
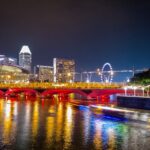
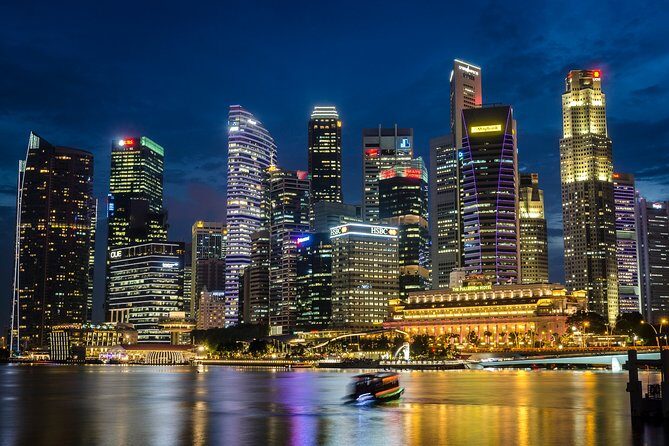
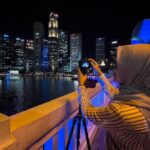
Jubilee Bridge + Marina Bay: learn to read light across water
Next up is Jubilee Bridge, then Marina Bay. This section is where your lesson can start to click, because it forces you to deal with reflective surfaces and shifting light.
Water and skyline scenes are a great classroom for:
- Exposure control (the highlights can be unforgiving)
- Focus decisions (what’s sharp vs what’s intentionally soft)
- Stabilizing your intent (especially if you’re shooting handheld)
Jubilee Bridge works as a photographic tool, not just a transit stop. It gives you lines, layers, and angles that naturally lead the eye. And Marina Bay gives you the bigger challenge: modern Singapore light can be dramatic, but it also changes quickly with the weather and the time of day.
If you’re learning, this is where you’ll appreciate realtime help. Multiple comments praised the guide’s responsiveness and ability to provide practical tricks. That kind of feedback matters because your camera settings look simple in theory, but the scene will test them right away.
You can also read our reviews of more photography tours in Singapore
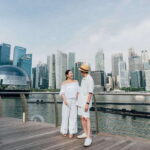
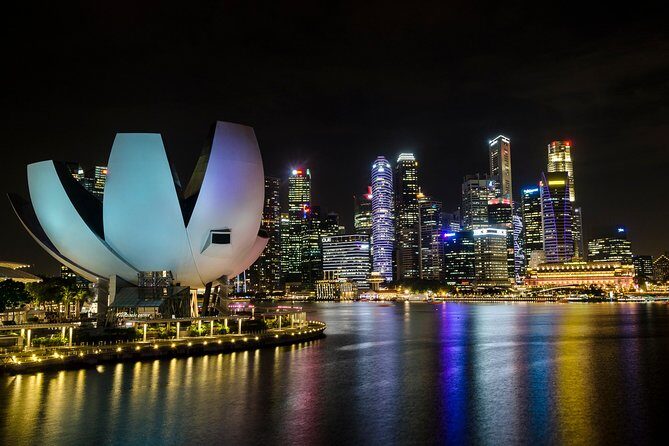
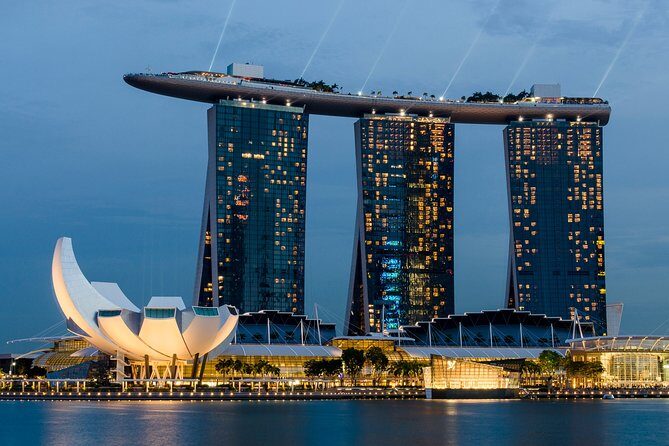
The Helix Bridge to Gardens by the Bay: practice “clean frames” in a bright city
The itinerary continues with The Helix Bridge, then heads toward Gardens by the Bay. These are both high-impact photo zones, but they also teach you different skills.
Helix Bridge is a geometry lesson. You can learn how to:
- Frame repeating patterns
- Use leading lines for composition
- Manage perspective without your image looking stretched or awkward
Then Gardens by the Bay brings a different challenge: you’re moving from bright open spaces to areas where you might deal with stronger contrast, reflective highlights, and architectural details competing for attention.
This is a strong place to focus on composition. Even if you understand settings already, composition is what turns a technically correct photo into something you actually want to keep.
If you’re aiming for night results, you’re usually not thrown directly into full darkness. You move through the transition from twilight toward night, and that timing is useful for learning. Twilight is often the sweet spot where the sky still has tone, and the city lights start to show real character.
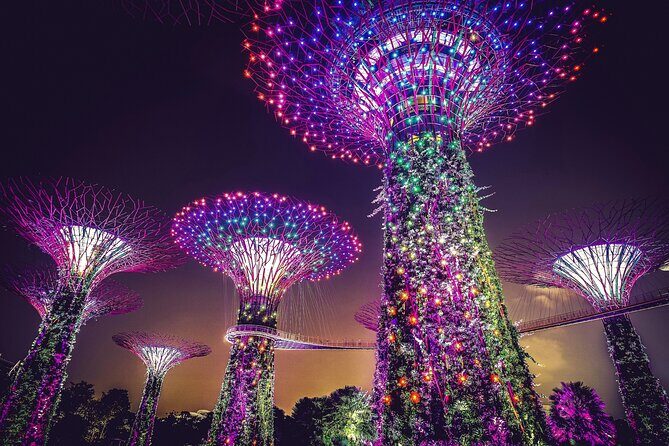
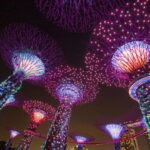
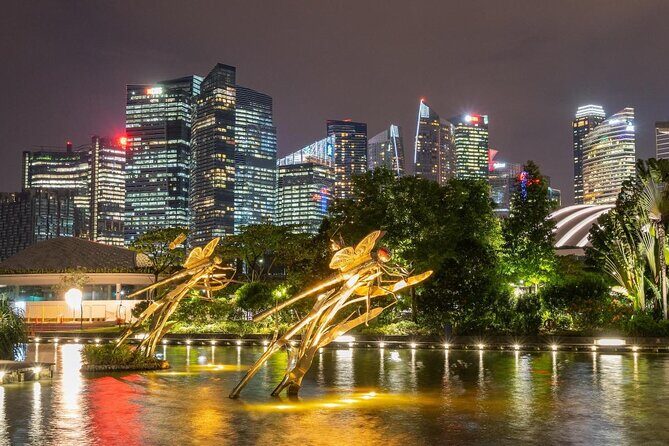
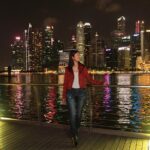
Supertree Grove: the moment your night portfolio starts looking professional
The tour ends around Supertree Grove and the Supertree light show area at Gardens by the Bay during the night option. This is the payoff section for a night portfolio.
What makes this stop especially useful for a photography lesson is that it forces you to solve multiple problems at once:
- Bright color sources
- Mixed lighting temperatures
- Motion from lights and people
- The temptation to overexpose or underexpose
The good news: the route is designed to support this. You don’t arrive after the best light has already happened. The idea is to capture Marina Bay at twilight, then move across to the Gardens area as the city changes.
If you choose this night route, you’ll probably leave thinking differently about your settings and shooting rhythm. Instead of guessing, you learn how to adjust on the fly based on what the scene is doing right now.
Practical consideration: you may want a tripod for stable night shots, but a tripod is not included. Tripods are available to hire, so plan for that if you’re serious about sharp night images.
Price and value: what $190 gets you in real teaching time
At $190 per person for an approximately 3-hour private lesson, this isn’t a budget “walk and talk.” It’s paying for two things you can’t easily DIY in Singapore:
1) A teacher watching your results live
If your guide is adjusting your approach based on what you’re getting, that’s real value. One review highlighted how the guide gave realtime feedback and tricks while also respecting the student’s creative choices. That combination is hard to find. It’s not just correction; it’s coaching.
2) A route built for photo practice
Chinatown, then the temple area, then the bridges and Marina Bay, then Gardens and Supertree Grove—this route isn’t random. It moves you through different lighting and compositional styles so you actually learn, rather than just collect landmark shots.
There’s also a small but helpful note: group discounts are available. If you’re traveling with a friend who wants to shoot too, sharing this kind of instruction can feel like a better deal.
In short: if you want a guided day of shooting with settings coaching, this price can make sense quickly. If you’re just looking for quick sightseeing photos without tweaking any settings, you might feel like you paid for instruction you didn’t fully use.
Who this tour suits best (and who might feel mismatched)
This masterclass is well matched for:
- Beginners to semi-pros who want clear instruction on exposure and focus
- Anyone who bought a camera recently and wants a simple path to using it well
- Street photographers who want better framing and confidence
- Night shooters who want to understand how to handle low light and neon/city lighting
It’s also a good option if you’re picky about results. Reviews emphasized that the guide can customize the session to your wants and still support your own style.
A mismatch to watch for: if you already have a firm grasp of exposure basics and you only want a short, casual stroll for inspiration, the instruction-focused format may feel like more structure than you need. The same could be true if you dislike photo coaching. This is built for practice.
Practical tips to get sharper results fast
You’ll get more out of the session if you show up thinking like a shooter.
- Bring the camera you’ll actually use. The guide can help with settings regardless of your exact model, but your familiarity will help you move quickly between shots.
- Decide whether you want daytime street practice or a night portfolio before you go. Picking your goal saves time.
- Think about a tripod for the night option. You can hire one since it’s not included.
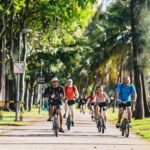
- Wear comfortable shoes. The route goes through several major areas, and you’ll want to move smoothly without rushing.
- Set a simple personal goal. For example: improve focus consistency, learn shutter speed for motion, or get cleaner exposure in bright zones.
If you’re the type who gets frustrated by trial-and-error, this tour is designed to reduce that frustration. You’ll be guided step-by-step while you experiment, instead of learning all at once later.
Should you book this Singapore Photography Masterclass?
I’d book it if you want real guidance and a route that teaches you across different Singapore lighting styles—Chinatown textures, Marina Bay light, and the Gardens/Supertree night look. The private format plus realtime feedback is exactly what helps you progress.
I wouldn’t book it if you’re mainly after a sightseeing photo walk with minimal camera work. This experience is built around understanding settings and applying them while you shoot.
If you fit the first group, you’re in good shape. And if your guide is someone like Lance—who’s been praised for being flexible, easy to talk to, and genuinely helpful—you’ll likely come away with photos you can build a portfolio from, plus techniques you can reuse on your next trip.
FAQ
How long is the Singapore Photography Masterclass?
It runs for about 3 hours.
Is this a private photography lesson?
Yes. It’s a private tour/activity, with only your group participating.
Where does the tour start and end?
It starts at Esplanade Bridge, Esplanade Dr, Singapore, and it ends back at the meeting point.
Do I need to bring my own camera?
Yes. A camera is not included.
Is a tripod included?
No. A tripod is not included, but tripod hire is available.
What’s included in the price?
You get a Professional Photographer Guide, a Local Guide, and the private tour.
What are my route options during the session?
You can opt for a daytime street photography tour or build your night portfolio. On the private photo tour, you can also choose your own route.
Is there a mobile ticket?
Yes. Mobile ticket is included.
Can I cancel for a full refund?
Yes, free cancellation is available. You can cancel up to 24 hours in advance for a full refund.